Home Lighting Calculator
Lighting Setup Guide
Calculate the perfect lighting solution for your home staging needs
Recommended Lighting Setup
Enter room details to see your lighting recommendations
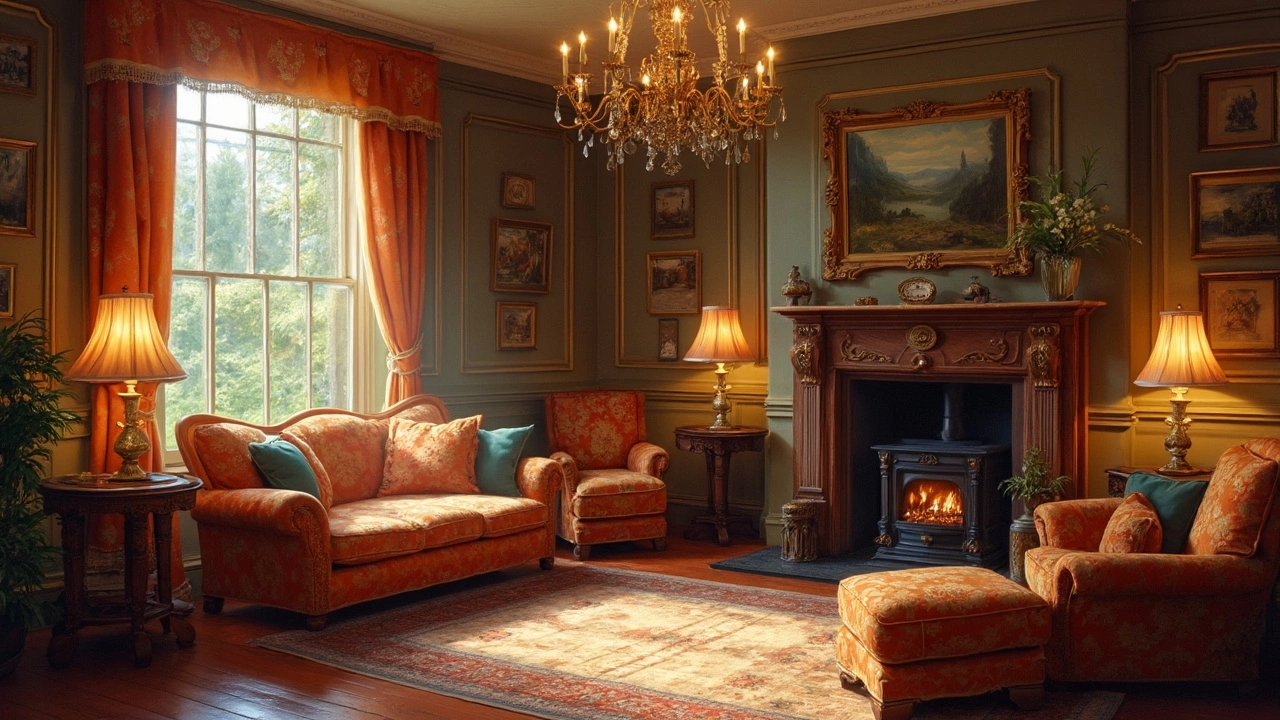
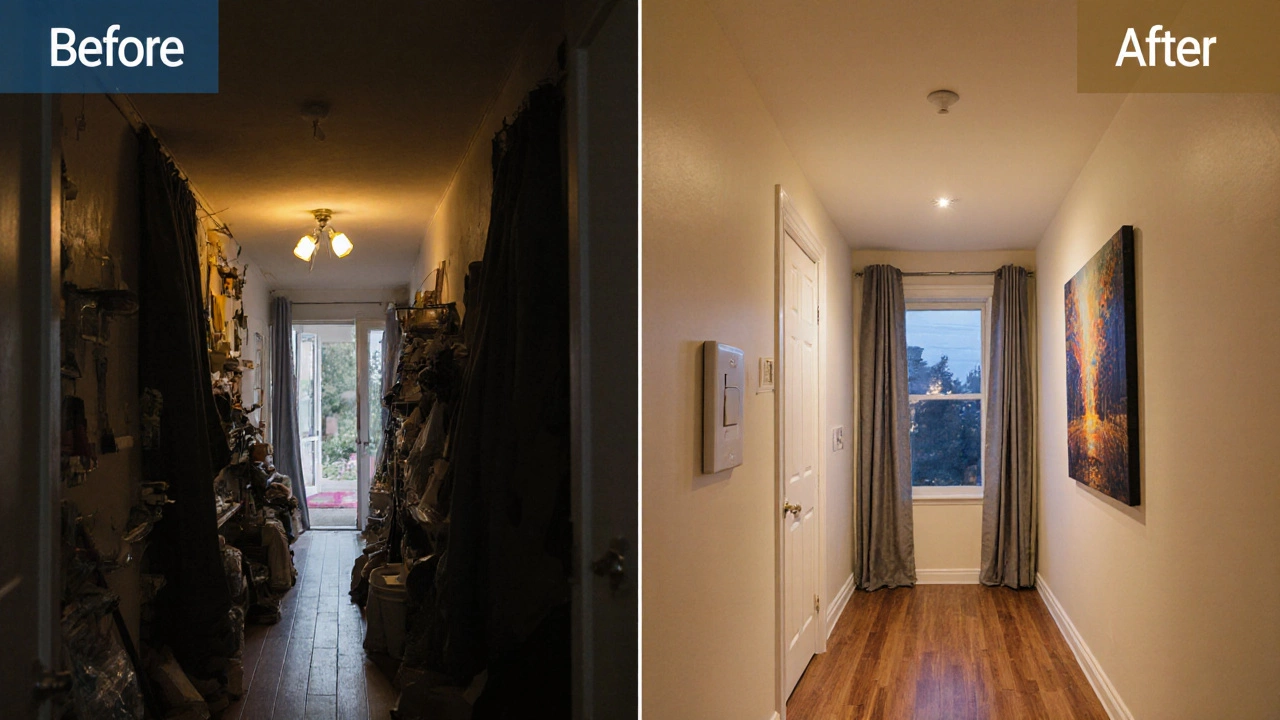
When you put a house on the market, the way it looks under light can make or break a buyer’s first impression. The right fixtures, bulb choices, and placement turn a plain room into a welcoming showcase. Below is a step‑by‑step guide that shows you how to choose, install, and style the home lighting that helps sell a property faster and at a better price.
What Real Estate Lighting Is and Why It Matters
Real Estate Lighting is a strategic use of artificial and natural light to highlight a property's best features during a sale. It differs from everyday lighting because its goal is to create a neutral, inviting atmosphere that lets potential buyers picture themselves living there. Studies by the National Association of Realtors show homes with staged lighting sell about 7% faster and often fetch a higher final price.
Choosing the Right Bulb Technology
LED Bulb is a solid‑state light source that offers high energy efficiency, long lifespan, and excellent color rendering. Compared with halogen or CFL options, LEDs cost a bit more up front but save money over time and provide the consistent brightness needed for showings.
Other common bulb types include:
- Halogen Bulb provides a warm glow but wastes more energy and has a shorter life.
- CFL Bulb is more efficient than halogen but can flicker and has lower CRI.
For most rooms, a 800-1,100 lumens LED with a CRI (Color Rendering Index) of 80 or higher works best.
Understanding Color Temperature and Warmth
Warm White is a color temperature range between 2,700 K and 3,000 K that mimics the glow of traditional incandescent bulbs. Warm white creates a cozy, inviting feel-ideal for living rooms and bedrooms.
Conversely, Daylight is a color temperature of 5,000 K to 6,500 K that mimics natural sunlight. Use daylight in kitchens and bathrooms where a clean, vibrant look helps buyers imagine cooking or grooming.
A quick rule: match the room’s purpose. Warm for relaxing spaces, daylight for functional zones.
Placement Strategies That Highlight Space
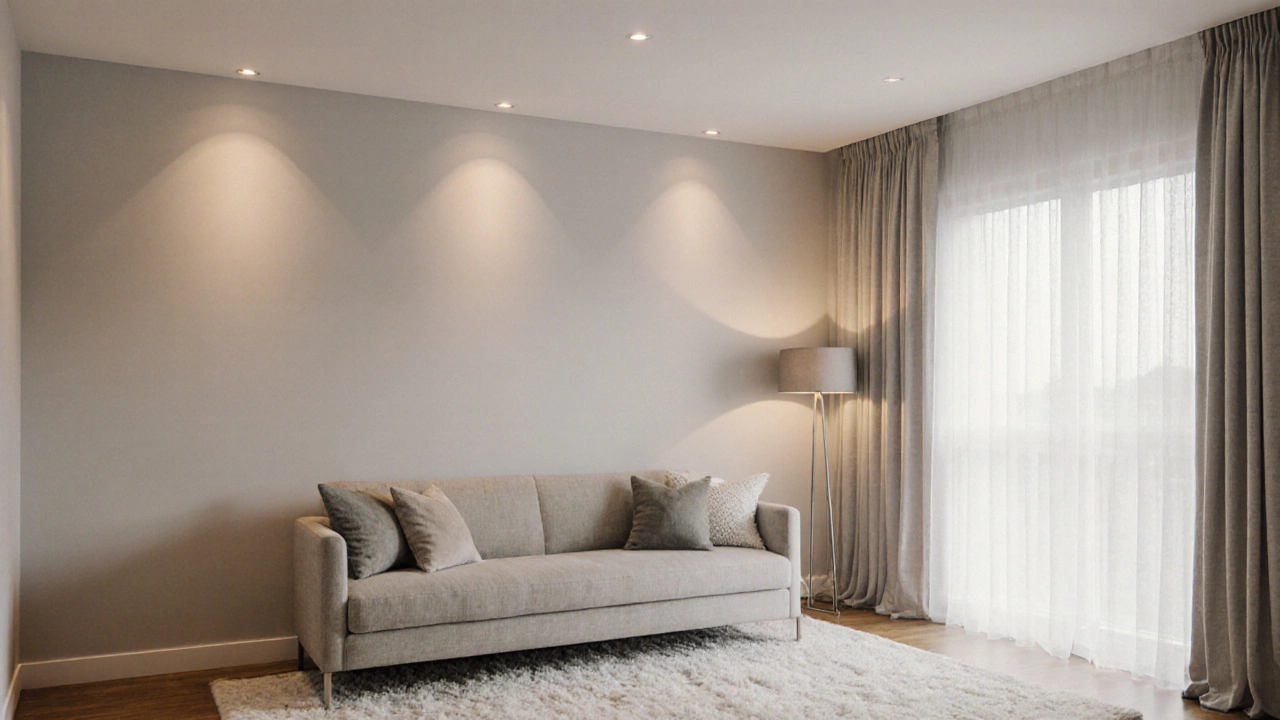
Recessed Lighting is a fixture installed within the ceiling, providing a sleek, unobtrusive light source. Place recessed lights evenly across larger areas like open‑plan living rooms to eliminate shadows and make the space feel bigger.
Accent Lighting is a targeted illumination that draws attention to architectural details, artwork, or focal points. Use a small directional LED or a track light to highlight a fireplace, built‑in shelving, or a striking view.
Floor Lamp is a portable lighting fixture that adds height and softness to corners or empty areas. A tall, brushed‑nickel floor lamp in a vacant corner instantly adds warmth and suggests a lived‑in feel.
Remember the 3‑point rule: general ambient light, task lighting (e.g., under‑cabinet LEDs in the kitchen), and accent lighting. Combining all three creates depth and balance.
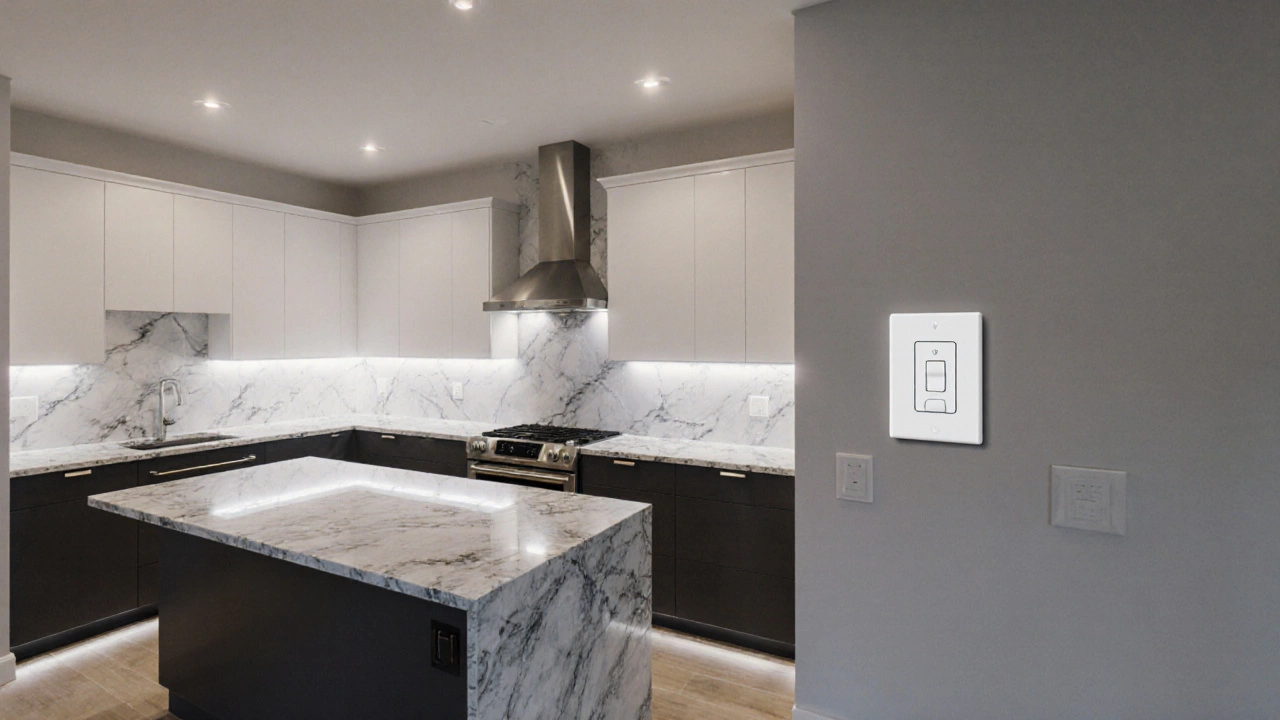
Smart and Dimmable Controls for Flexibility
Dimmable Switch is a wall‑mounted controller that lets you adjust brightness without changing bulbs. Install dimmers in living rooms and dining areas so you can soften the light for evening showings, creating a relaxed ambience.
Smart Lighting is a system that can be programmed or controlled via apps to set scenes, schedules, and brightness levels remotely. Platforms like Philips Hue or LIFX allow you to switch from a bright, open‑house setting to a softer, evening mood with a tap on your phone. For a quick sell, set a default “Open House” scene that turns all lights on at 3,000 lumens and another “Evening” scene at 1,200 lumens.
Budget‑Friendly Lighting Upgrades
If you’re watching costs, focus on high‑impact, low‑cost changes:
- Replace outdated incandescent bulbs with affordable LED equivalents (often under $5 each).
- Swap out cheap, dim, yellow‑tinted fixtures for simple white‑finished LED trims.
- Add a couple of inexpensive floor lamps or table lamps to empty corners (look for sales at IKEA or Home Depot).
- Install a few dimmer switches in key rooms-most cost under $30 plus basic wiring.
These upgrades usually stay under $200 total but can boost perceived value by several thousand dollars.
Comparison of Common Bulb Types for Home Staging
| Bulb Type | Cost (per bulb) | Lifespan (hours) | Energy Use (W) | Typical CRI |
|---|---|---|---|---|
| LED | $4‑$8 | 25,000‑50,000 | 8‑12 | 80‑95 |
| Halogen | $2‑$5 | 2,000‑4,000 | 40‑60 | 100‑110 |
| CFL | $3‑$6 | 8,000‑10,000 | 13‑18 | 70‑80 |
For staging, LED wins on energy, cost over time, and ease of color‑temperature selection. Halogen can be used sparingly for high‑CRI spots, but its heat output and energy draw make it less desirable.
Common Lighting Mistakes to Avoid
Even well‑intentioned sellers can trip up:
- Over‑brightening: Too many high‑lumens fixtures make a room feel clinical. Aim for a uniform, comfortable level (about 300-400 lux for living areas).
- Clashing temperatures: Mixing warm and daylight bulbs in the same room creates visual discord. Stick to one temperature per space.
- Ignoring natural light: Heavy drapes or dark window treatments cut off daylight, making rooms look smaller. Pull curtains back during showings.
- Leaving dimmers off: A dark hallway can feel unsafe. Ensure all switches are on.
Addressing these issues creates a seamless, inviting flow that lets buyers focus on the home’s features rather than its lighting flaws.
Step‑by‑Step Staging Checklist
- Audit existing fixtures: note wattage, color temperature, and condition.
- Replace every outdated bulb with a 2,700 K-3,000 K LED for living rooms/bedrooms; use 5,000 K LEDs in kitchens/baths.
- Install dimmer switches in at least two main gathering spaces.
- Add accent lighting to highlight focal points (fireplace, artwork, built‑ins).
- Introduce a floor lamp or table lamp in any empty corner.
- Open blinds/curtains to let natural daylight in; clean windows for maximum effect.
- Set up a “Open House” lighting scene on any smart system and test it.
- Do a final walk‑through at 4 p.m. (typical showing time) to confirm brightness feels natural.
Following this list usually takes a weekend and yields the biggest visual ROI.
Frequently Asked Questions
What color temperature sells a house faster?
Warm white (2,700‑3,000 K) in living areas creates a cozy vibe, while daylight (5,000‑6,500 K) in kitchens and bathrooms makes spaces feel clean and spacious. Using the right temperature for each room is more effective than any single “best” temperature.
Can I use cheap LED bulbs for staging?
Yes, as long as they have a CRI of at least 80 and the correct color temperature. Ultra‑cheap bulbs often have low CRI, which can make colors look washed out and deter buyers.
Should I install new fixtures or just change bulbs?
If the existing fixtures are outdated or mismatched, swapping them costs a bit more but gives a cohesive look. For most sellers, replacing bulbs and adding dimmers provides sufficient impact for a lower budget.
How many lights are enough for a living room?
Aim for an average illumination of 300‑400 lux. In practical terms, that’s usually three to four evenly spaced ceiling lights plus a floor or table lamp for layered ambience.
Do smart lights add value to a listing?
Smart lighting isn’t a deal‑breaker, but it signals a modern, move‑in ready home. A simple app‑controlled scene can impress tech‑savvy buyers and justify a modest price bump.
Lighting may seem like a small detail, but in real estate it’s a powerful tool. By swapping to the right bulbs, setting the proper color temperature, adding dimmers, and using a few well‑placed accent fixtures, you can make every room feel larger, brighter, and more inviting. Follow the checklist, avoid the common pitfalls, and watch your home attract offers faster.